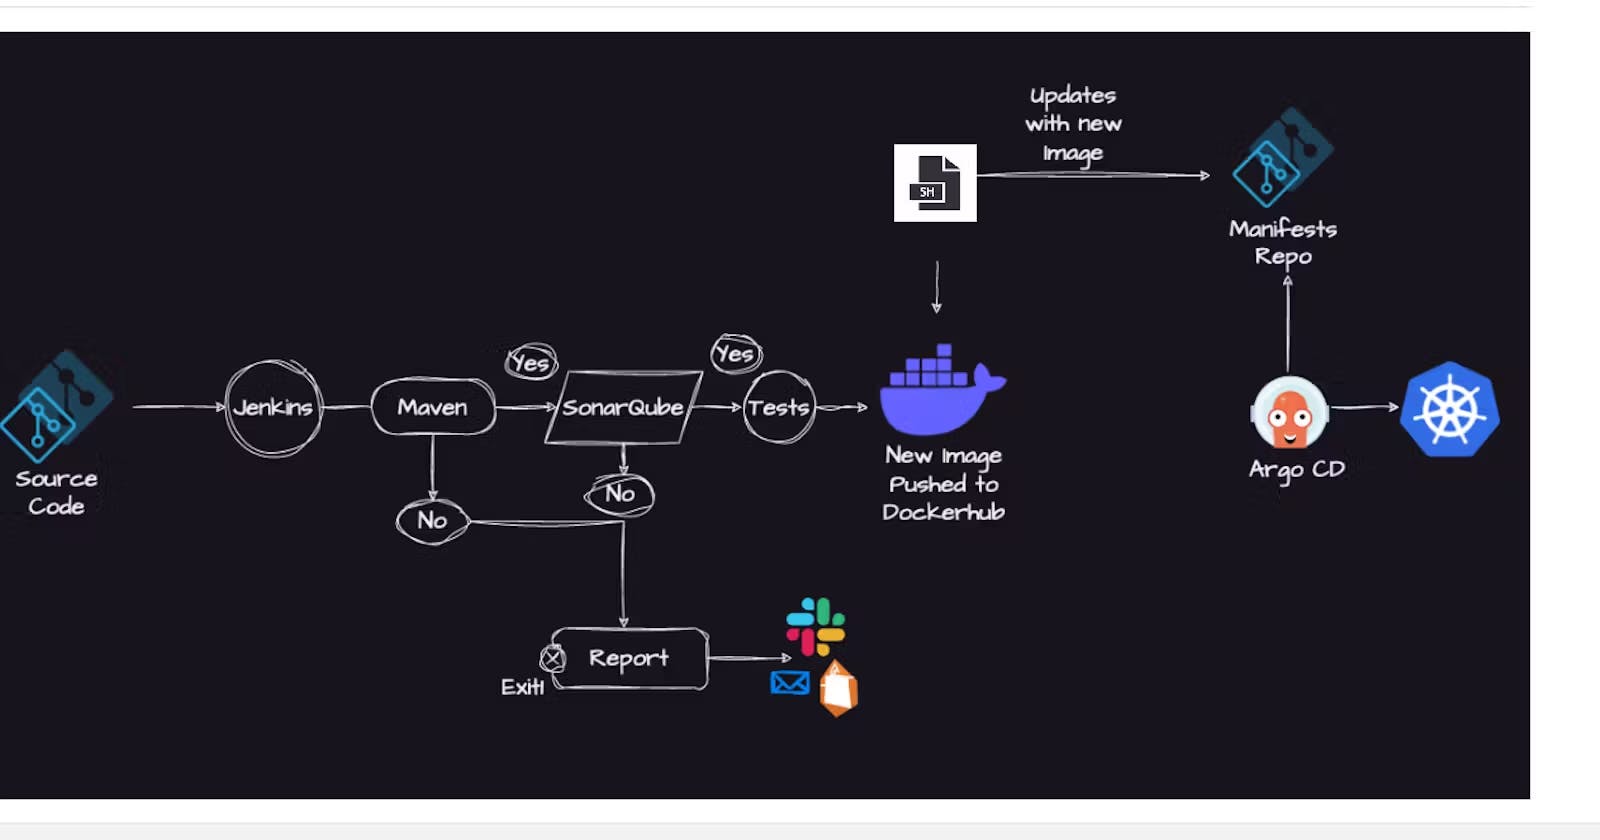
Building a CI/CD pipeline for a Java-based application on Kubernetes using Jenkins, Maven, SonarQube, and Argo CD.
Continuous Integration and Continuous Delivery (CI/CD) practices have become essential components of modern DevOps workflows, enabling teams to automate the build, test, and deployment processes.
In this project, we'll build a robust CI/CD pipeline for a Java-based application deployed on Kubernetes.
Our goal is to leverage popular DevOps tools such as Jenkins, Maven, SonarQube, and Argo CD to streamline the development lifecycle and ensure rapid, consistent, and error-free deployments.
By implementing a CI/CD pipeline, we'll demonstrate how teams can accelerate the delivery of software updates, improve collaboration between development and operations teams, and enhance overall software quality and reliability.
Overview of the tools and technologies used and their purpose:
Jenkins: Jenkins is an open-source automation server used for continuous integration and continuous delivery (CI/CD). It automates the process of building, testing, and deploying software projects.
Maven: Maven is a build automation tool primarily used for Java projects. It manages project dependencies, builds, and documentation using a project object model (POM).
SonarQube: SonarQube is an open-source platform for continuous code quality inspection. It performs static code analysis to detect bugs, vulnerabilities, and code smells in the codebase.
Argo CD: Argo CD is a declarative, GitOps continuous delivery tool for Kubernetes. It automates the deployment of applications to Kubernetes clusters based on changes in a Git repository.
Kubernetes: Kubernetes is an open-source container orchestration platform used for automating deployment, scaling, and management of containerized applications.
Minikube: Minikube is a tool that enables developers to run a single-node Kubernetes cluster locally on their machine. It is useful for testing Kubernetes deployments and applications in a development environment.
These tools and technologies collectively form the foundation for setting up a robust CI/CD pipeline for deploying Java-based applications on Kubernetes.
Each tool serves a specific purpose in the software development lifecycle, from building and testing code to deploying and managing applications in Kubernetes clusters.
To set up our development environment, we'll need the following:
Cloud Account (e.g., AWS):
- We'll use a cloud provider such as Amazon Web Services (AWS) to spin up an instance to serve as our Jenkins server and SonarQube instance and we would be installing docker in it.
Git Account:
- We'll use Git to track our source code and deployment files.
Kubernetes Cluster:
We'll need a Kubernetes cluster to deploy our application.
For simplicity, we'll use Minikube to set up a local Kubernetes cluster for development purposes.
Step 1 - Creating EC2 Instance
We would be starting with spinning up our server.
Here are the steps to spin up an instance on AWS to serve as our Jenkins server:
Log into your AWS account:
Open your web browser and navigate to the AWS Management Console.
Sign in using your AWS account credentials.
Navigate to EC2 Dashboard:
- Once logged in, navigate to the EC2 Dashboard by clicking on "Services" in the top menu and selecting "EC2" under "Compute".
Launch Instance:
On the EC2 Dashboard, click on the "Launch Instance" button to start the instance creation process.

Choose an Amazon Machine Image (AMI):
Select an AMI that meets your requirements. You can choose an Amazon Linux AMI or any other AMI that supports Jenkins installation. I would be going with ubuntu.

Choose an Instance Type:
Select an instance type based on your requirements. We would be going with a
t2.largeinstance for better memory because as i mentioned earlier we would be setting up Jenkins and Sonarqube on this server.You would also need to create a key-pair if you don't have one so you would be able to ssh into the server.

Configure Security Group:
To ensure secure access to your server, create a new Security Group with the following inbound rules:
Allow SSH (port 22) to enable secure remote access to your server.
Allow HTTP (port 80) for web traffic.
Allow HTTPS (port 443) for secure web traffic.
Ensure that the source for each rule is set to "Anywhere" to allow traffic from any IP address.
However, note that allowing traffic from anywhere is not advisable in a production environment due to security concerns.
Access the Instance:
Once the instance is launched, you can access it via SSH using the public IP or DNS provided by AWS.

With these steps completed, you'll have successfully spun up an instance on AWS to serve as your Jenkins server.
Now you can proceed with installing and configuring Jenkins on this instance.
After launching the instance, you need to SSH into it to configure Jenkins.
Here's how you can do it:
Locate the PEM file:
- Find the PEM file you downloaded when creating the key pair. This PEM file contains the private key necessary for SSH access to the instance.
Set permissions for the PEM file:
Ensure that the permissions for the PEM file are set to be read-only for the owner.
You can do this by running the following command in your terminal:
chmod 400 /path/to/your-key.pem
SSH into the instance:
Open your terminal and navigate to the directory where the PEM file is located.
Use the SSH command along with the PEM file and the public IP or DNS of your AWS instance to establish an SSH connection.
The command will look like this:
ssh -i /path/to/your-key.pem ec2-user@your-instance-public-ipReplace
/path/to/your-key.pemwith the path to your PEM file, andyour-instance-public-ipwith the public IP address of your AWS instance.
Connect to the instance:
- If everything is set up correctly, you should now be connected to your AWS instance via SSH.
Once connected, you can proceed with installing and configuring Jenkins on the instance as needed.
Step 2 - Installing Jenkins.
Pre-Requisites: We need to have Java installed
- Java (JDK)
Run the below commands to install Java and Jenkins
Install Java
sudo apt update
sudo apt install openjdk-11-jre
Verify Java is Installed
java -version
Now, you can proceed with installing Jenkins
curl -fsSL https://pkg.jenkins.io/debian/jenkins.io-2023.key | sudo tee \
  /usr/share/keyrings/jenkins-keyring.asc > /dev/null
echo deb [signed-by=/usr/share/keyrings/jenkins-keyring.asc] \
  https://pkg.jenkins.io/debian binary/ | sudo tee \
  /etc/apt/sources.list.d/jenkins.list > /dev/null
sudo apt-get update
sudo apt-get install jenkins
Note: By default, Jenkins will not be accessible to the external world due to the inbound traffic restriction by AWS.
Open port 8080 in the inbound traffic rules as shown below.
EC2 > Instances > Click on
In the bottom tabs -> Click on Security
Security groups
Add inbound traffic rules as shown in the image (you can just allow TCP 8080 as well, in my case, I allowed
All traffic).
Login to Jenkins using the below URL:
ec2-instance-public-ip-address:8080
[You can get the ec2-instance-public-ip-address from your AWS EC2 console page]
Note: If you are not interested in allowing All Traffic to your EC2 instance
1. Delete the inbound traffic rule for your instance
2. Edit the inbound traffic rule to only allow custom TCP port 8080
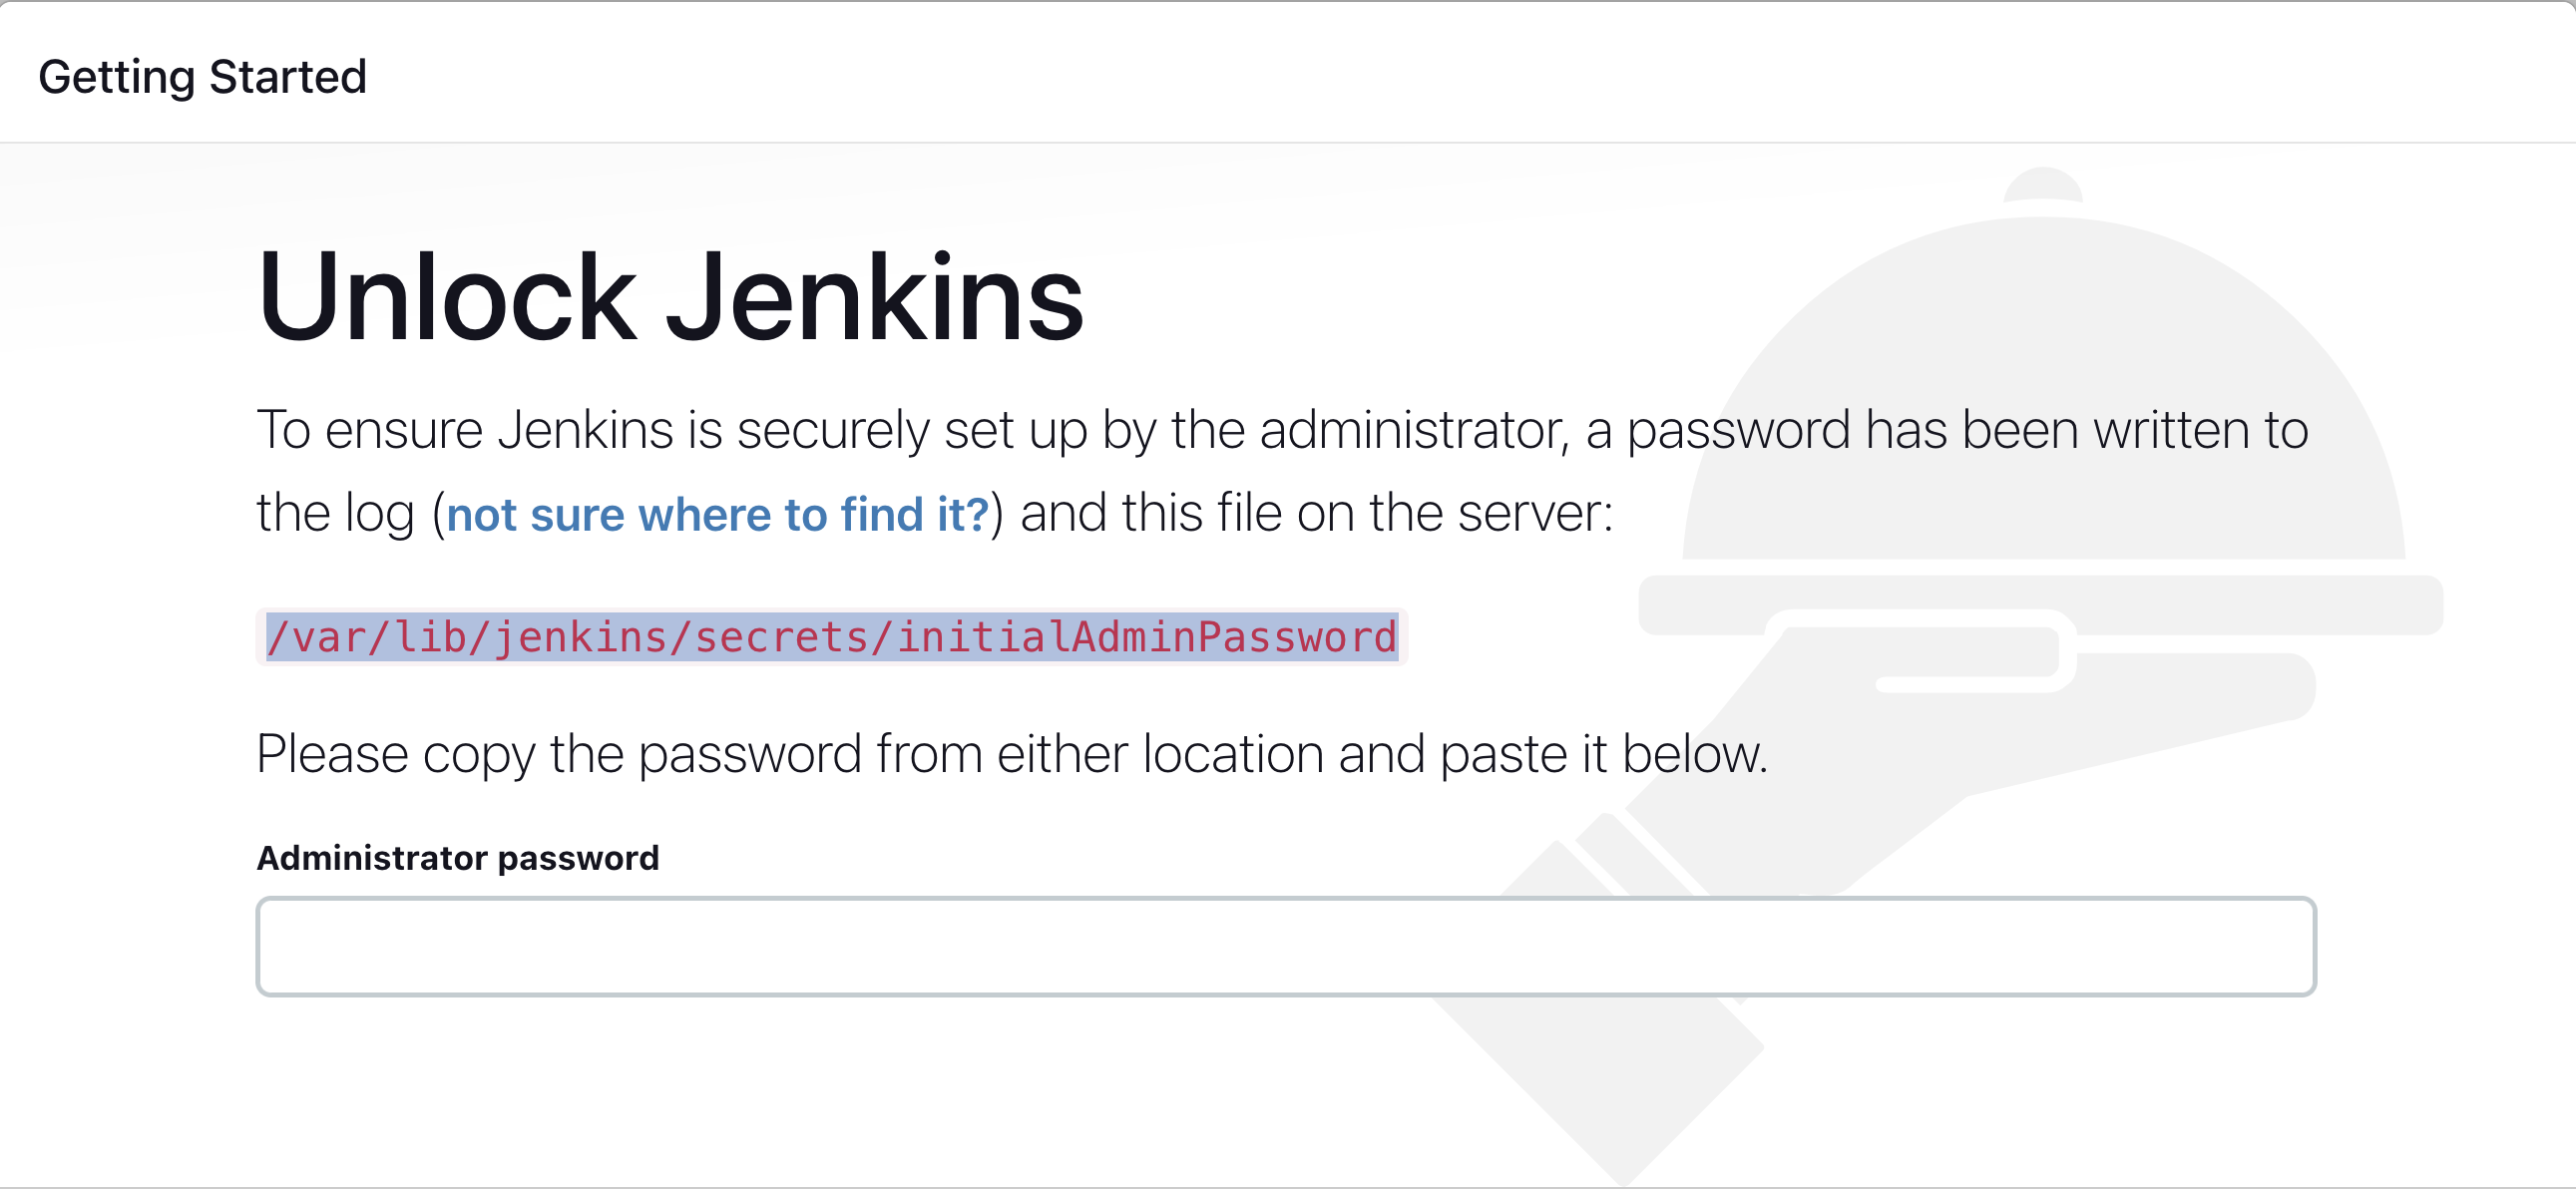
To login into Jenkins, - Run the command below on your terminal to copy the Jenkins Admin Password
sudo cat /var/lib/jenkins/secrets/initialAdminPassword
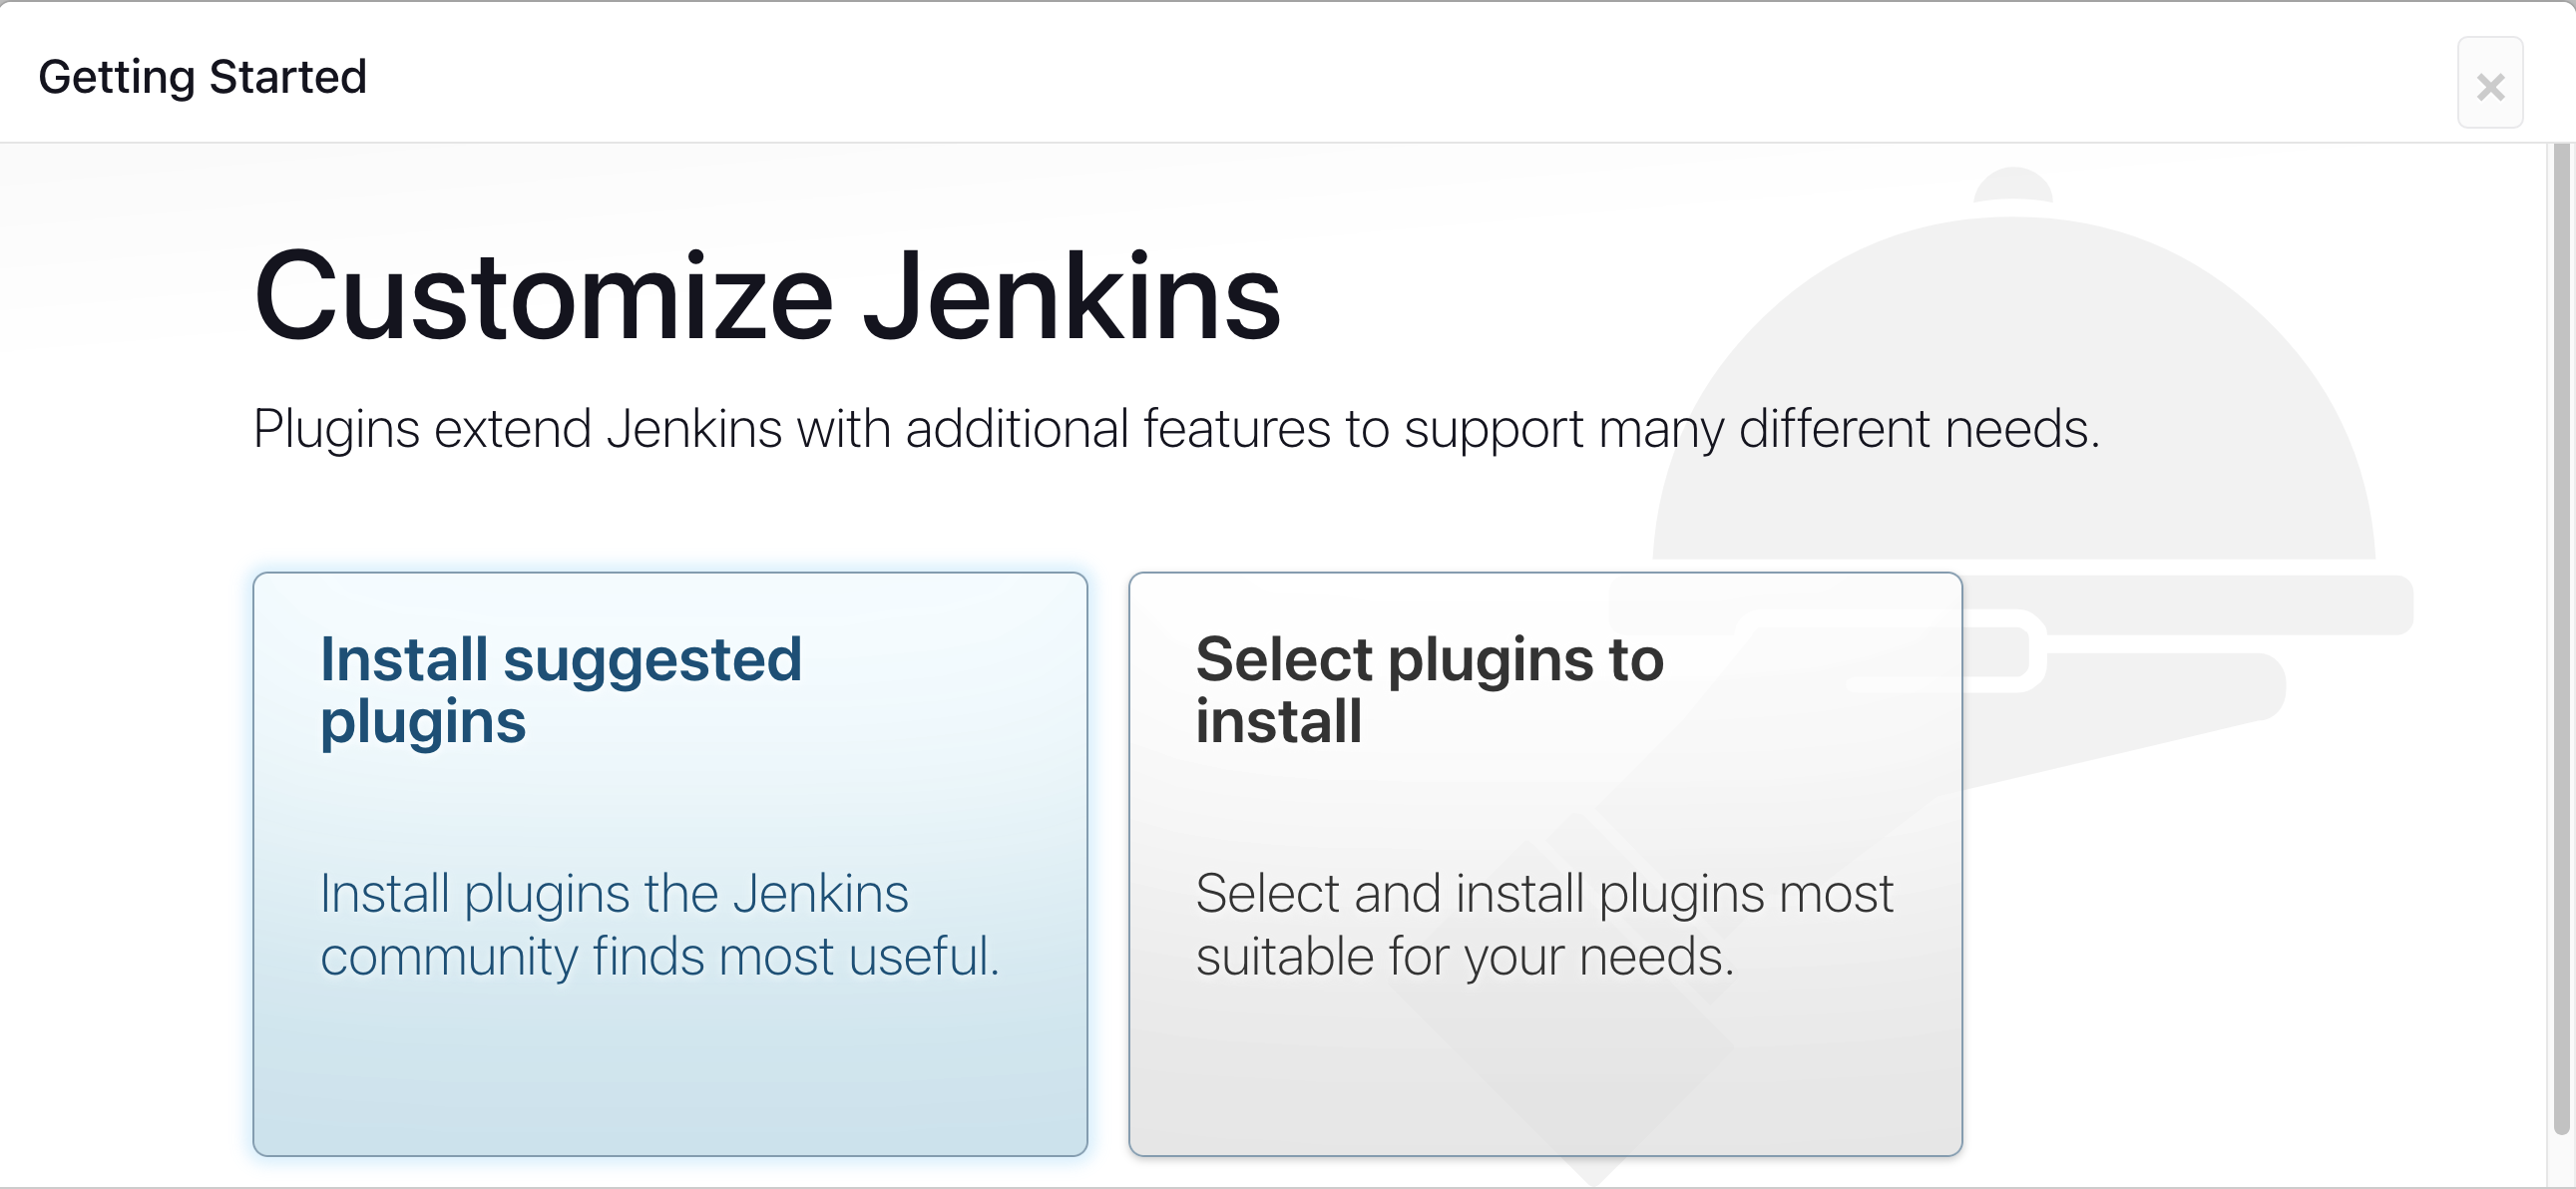
Click on Install suggested plugins
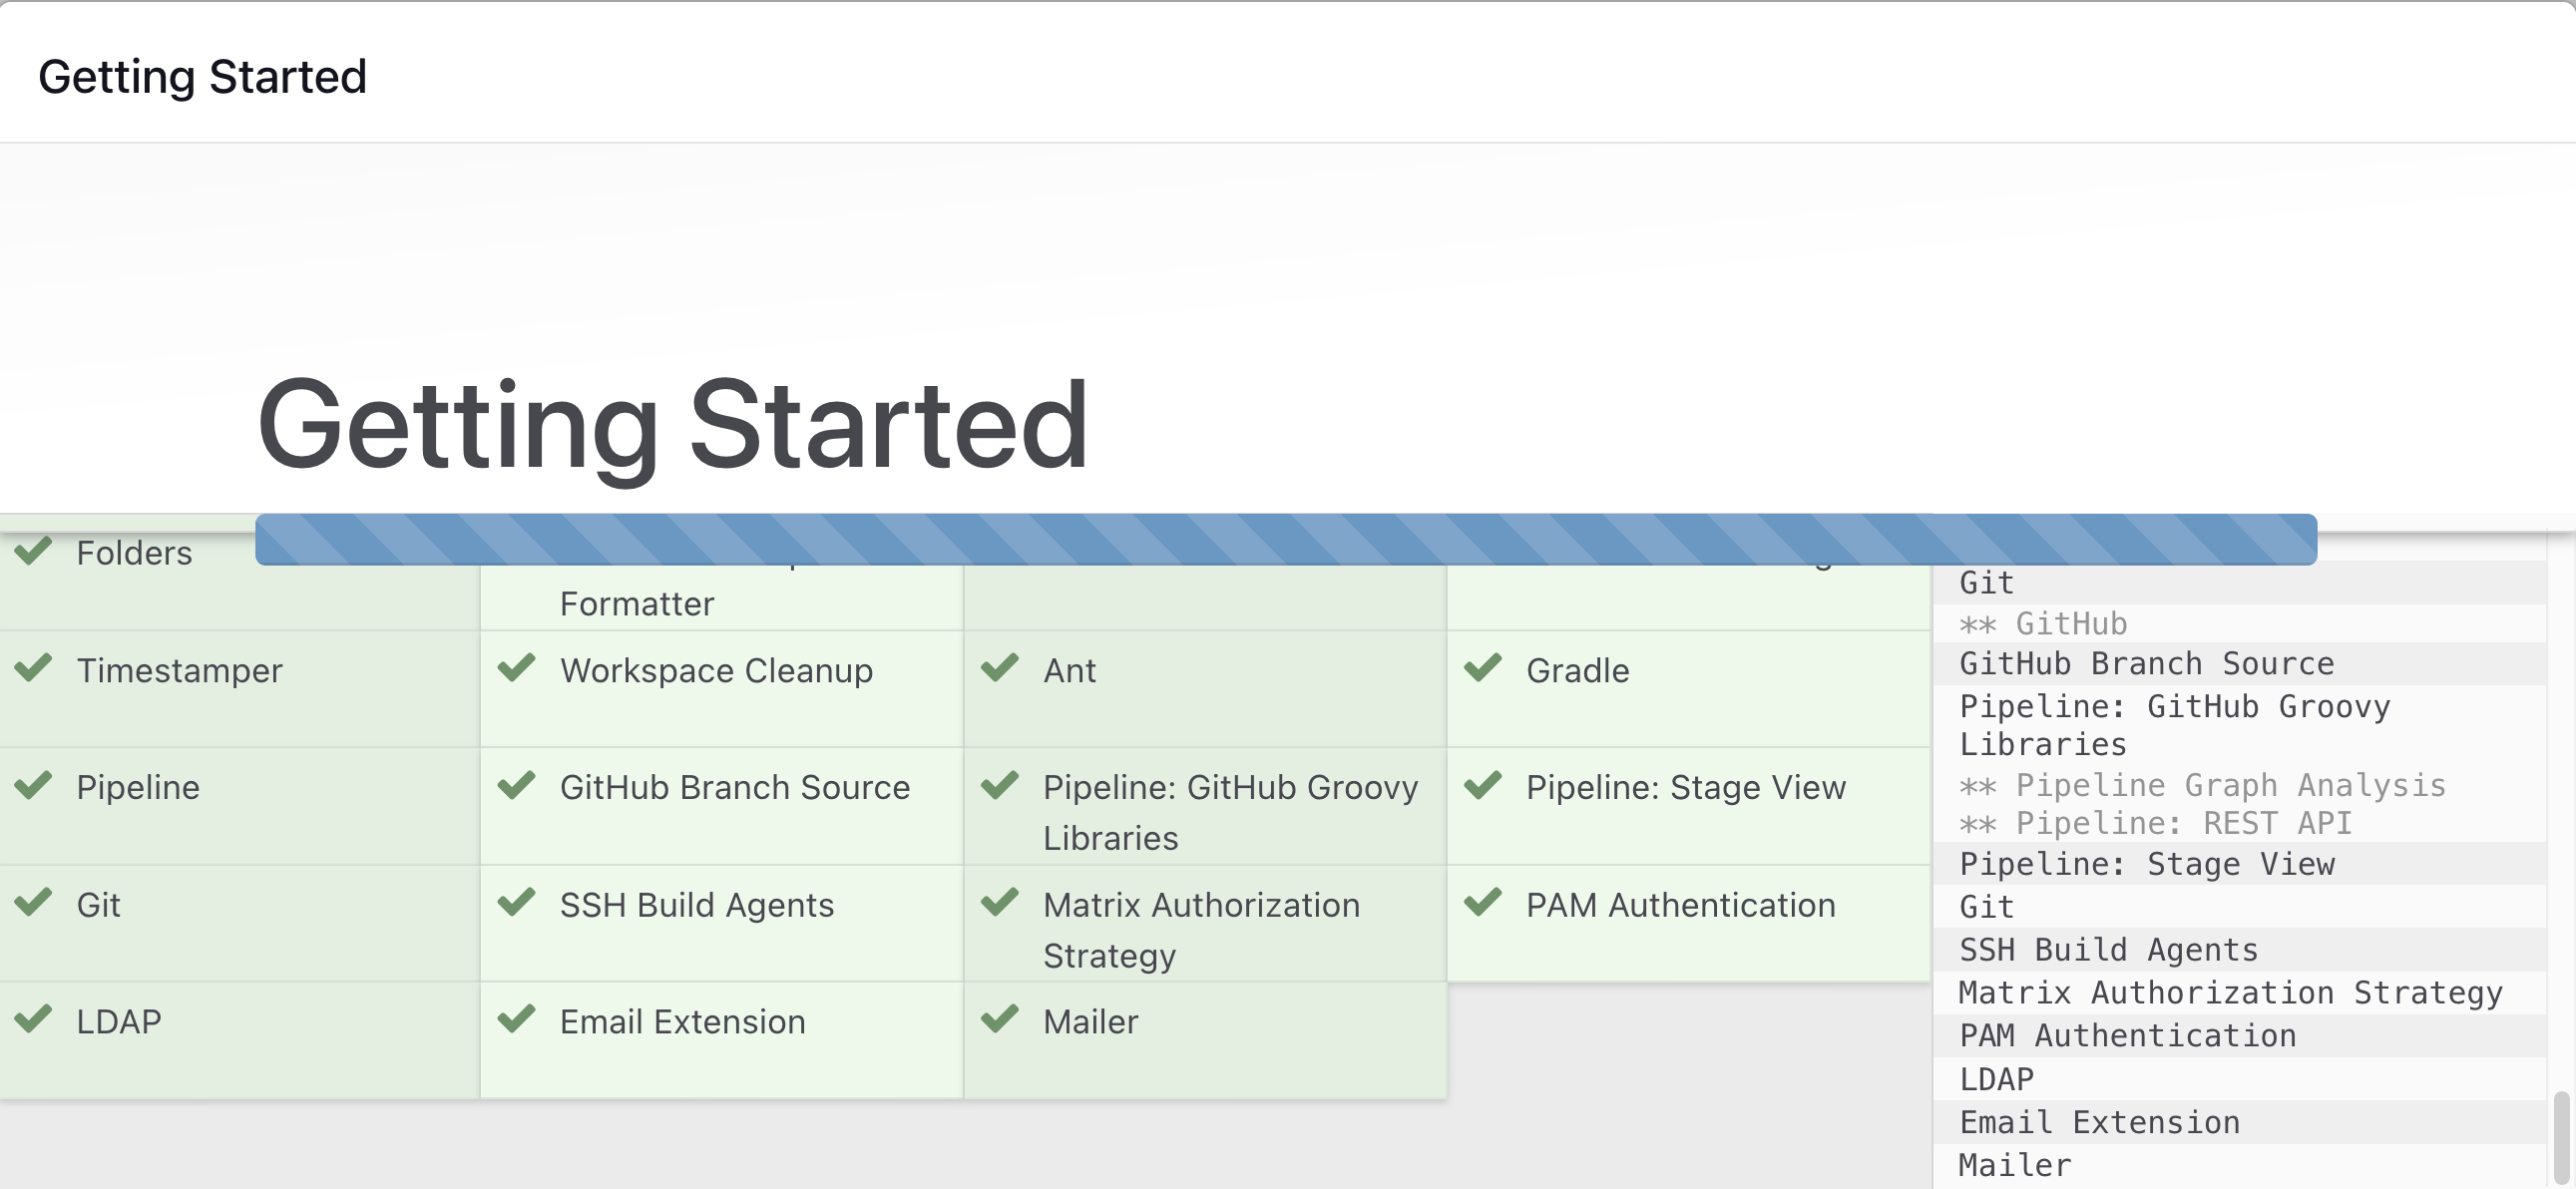
Wait for Jenkins to Install suggested plugins
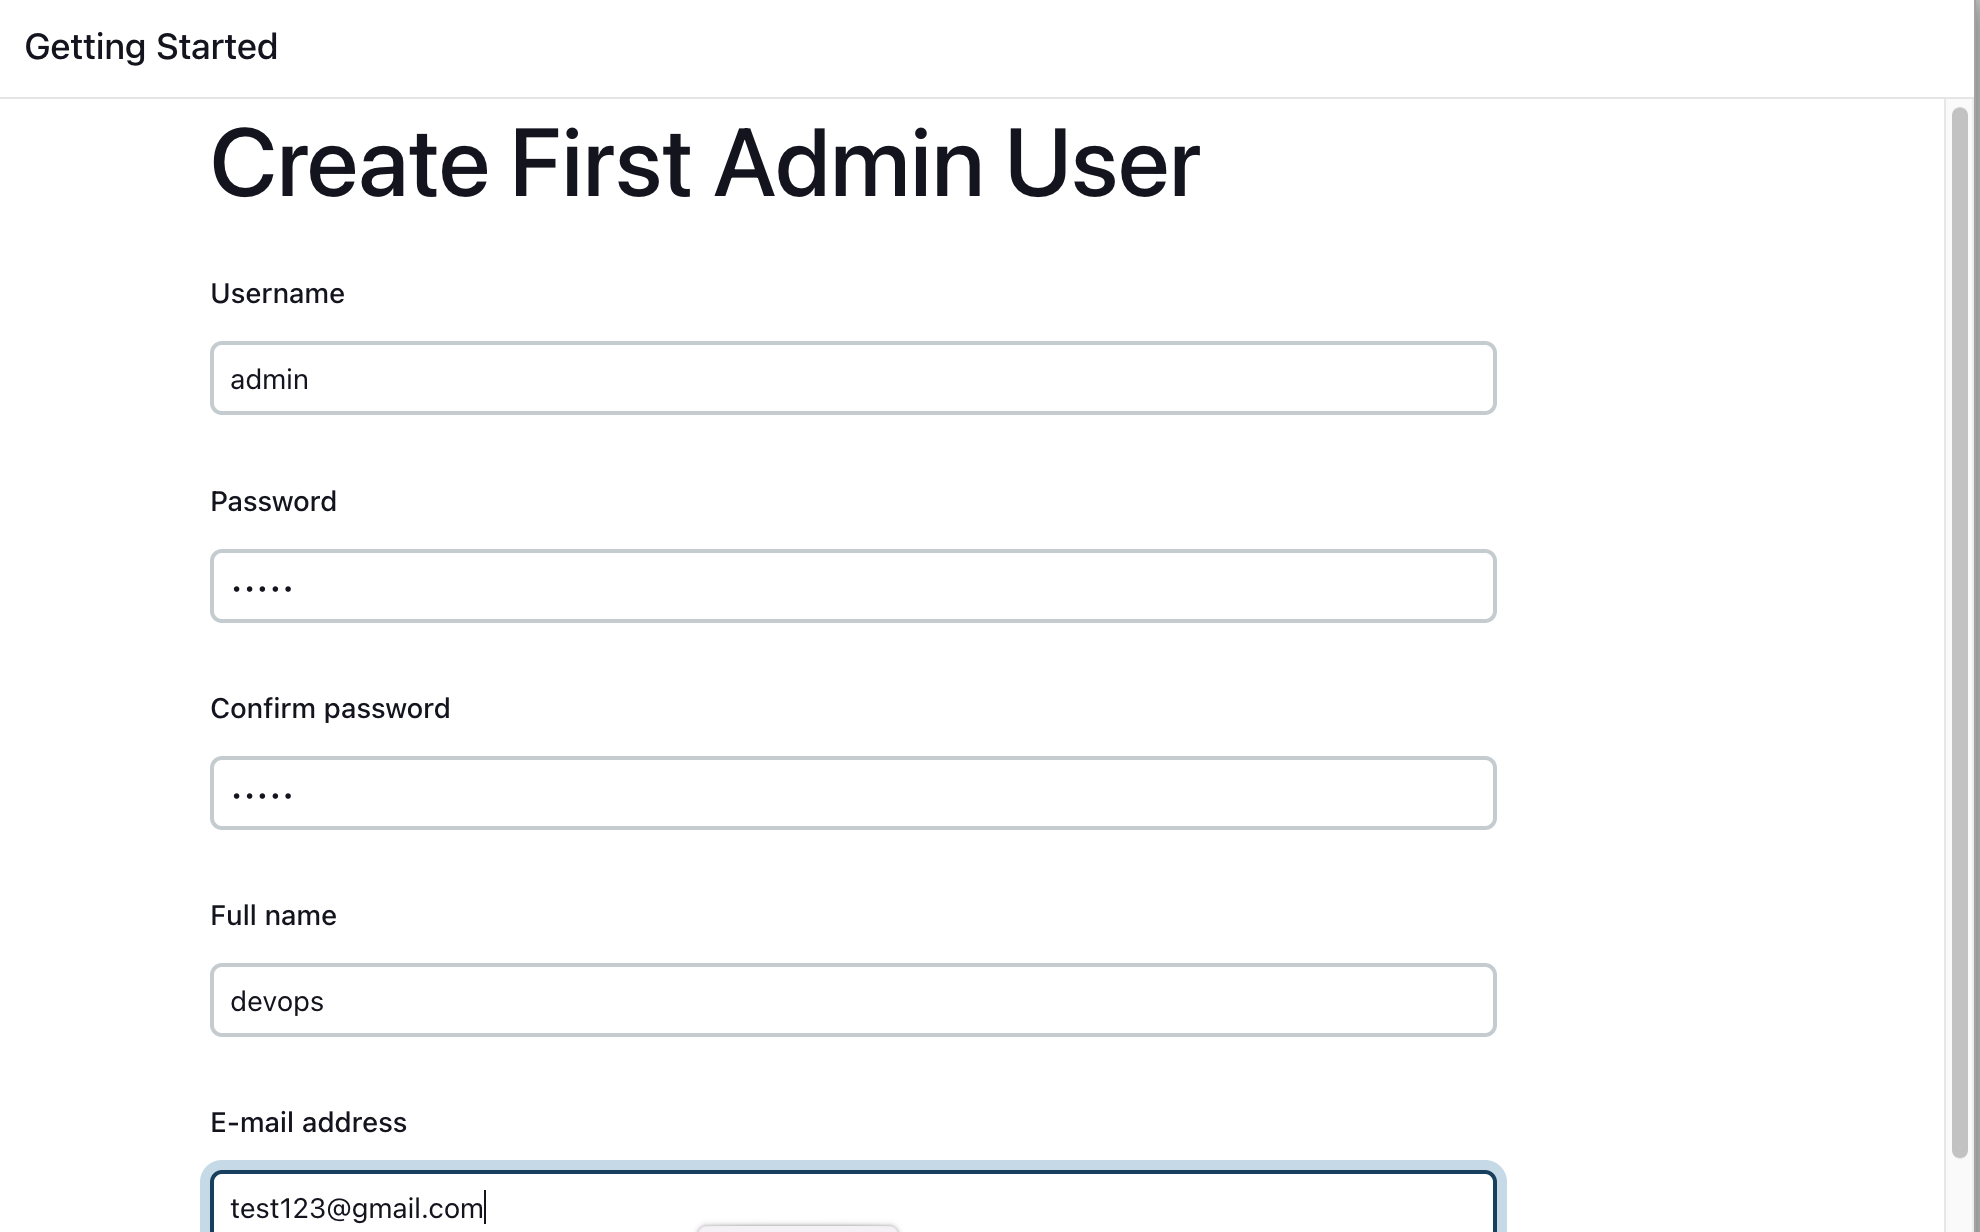
Create First Admin User or Skip the step [If you want to use this Jenkins instance for future use-cases as well, better to create admin user]
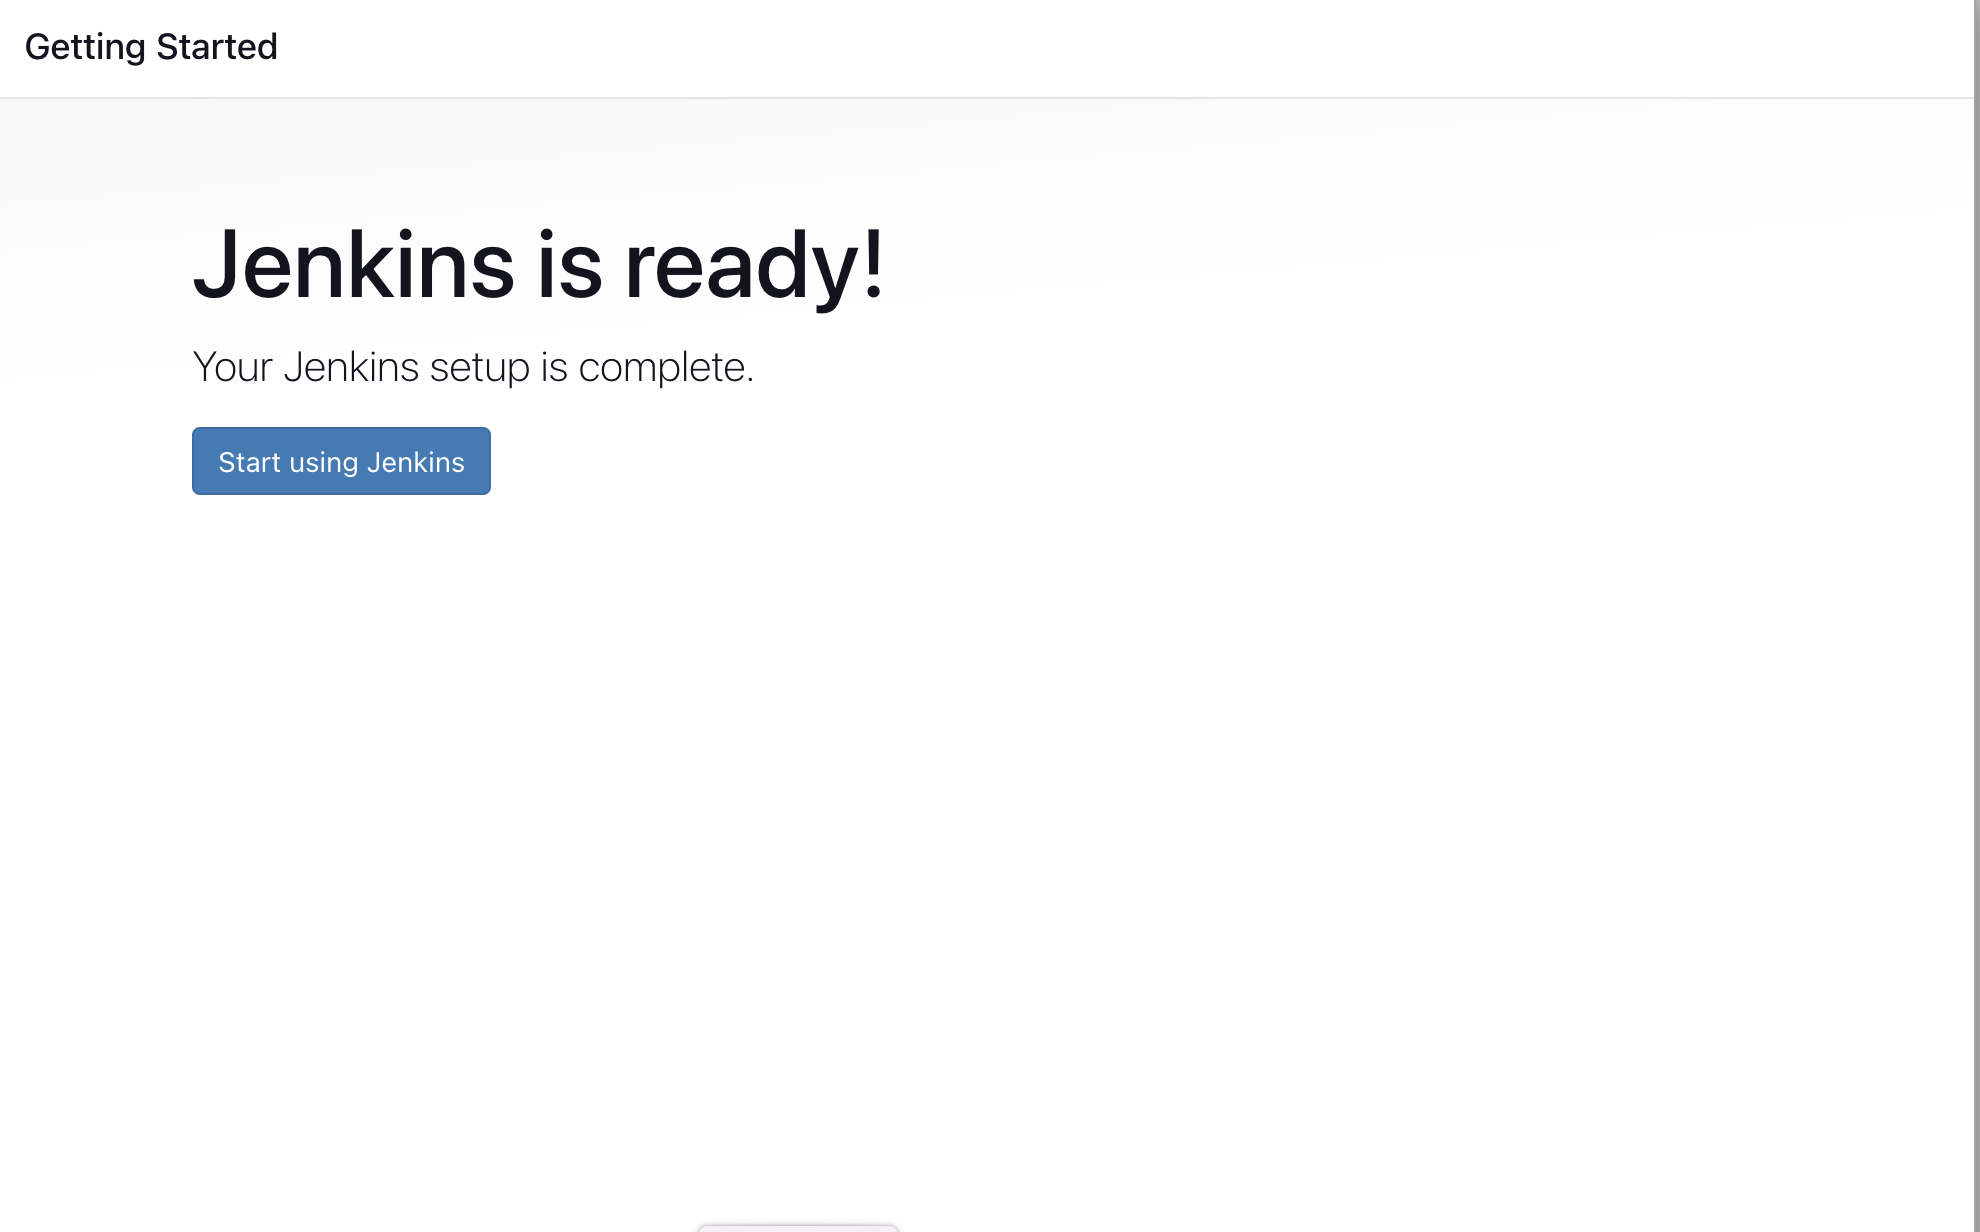
Jenkins Installation is Successful. You can now starting using the Jenkins
With our Jenkins server ready we can now proceed to setting up Sonarqube on our server
Step 3 - Setting up SonarQube
we are setting up our sonar on the same server as Jenkins and this requires opening an additional port for SonarQube to run.
Sonarqube on default runs on port 9000
Follow these steps to set up your SonarQube server:
Install Required Packages:
 sudo apt update
 sudo apt install unzip
Create a SonarQube User and switch to that user:
 sudo adduser sonarqube
 sudo su - sonarqube
Download and Extract SonarQube:
 wget https://binaries.sonarsource.com/Distribution/sonarqube/sonarqube-9.4.0.54424.zip
 unzip sonarqube-9.4.0.54424.zip
Set Permissions:
 chmod -R 755 /home/sonarqube/sonarqube-9.4.0.54424
 chown -R sonarqube:sonarqube /home/sonarqube/sonarqube-9.4.0.54424
Start SonarQube:
 cd sonarqube-9.4.0.54424/bin/linux-x86-64/

 ./sonar.sh start
After running these commands, SonarQube will be up and running on port 9000.
You can access it by navigating to the IP address of your server followed by port 9000 in a web browser.
The default username and password for SonarQube are both "admin".
Ensure that the necessary security permissions are configured to allow traffic to port 9000 from your desired IP addresses.
Earlier when we were setting up security permission we allowed traffic from every where, so you just need to visit the ip on port 9000
With SonarQube set up, you can now leverage its static code analysis capabilities to improve code quality in your CI/CD pipeline.
Step 4 - Installing Docker on your server.
Now that we have both Jenkins and Sonarqube running on our server, we would be doing one last installation on the server - which is installing docker.
This is essential because we'll be packaging our applications into containers using Docker.
Run the below command to Install Docker
sudo apt update
sudo apt install docker.io
Grant Jenkins user and Ubuntu user permission to docker deamon.
sudo su -
usermod -aG docker jenkins
usermod -aG docker ubuntu
systemctl restart docker
Once you are done with the above steps, it is better to restart Jenkins.
http://<ec2-instance-public-ip>:8080/restart
The docker agent configuration is now successful.
With all of these done, our server is set and we can now proceed to setting up our Pipeline.
Step 5 - Installing plugin in Jenkins for our pipeline
Installing plugins in Jenkins is crucial for enabling various functionalities and integrations within your CI/CD pipeline.
In this step, we'll install plugins in Jenkins to facilitate seamless integration between our tools.
Firstly, we'll install the Docker plugin.
As i mentioned earlier this is essential because we'll be packaging our applications into containers using Docker.
Additionally, we'll utilize Docker as an agent for our pipeline.
Secondly, we'll install the SonarQube plugin.
Since we'll be leveraging SonarQube for code quality analysis as part of our pipeline, installing this plugin is crucial for seamless integration.
This plugin enables Jenkins to interact with SonarQube, allowing us to incorporate static code analysis into our CI/CD pipeline effortlessly.
By installing these plugins, we streamline the integration between Jenkins, Docker, and SonarQube, enabling efficient and automated CI/CD processes for our Java-based application.
Here are the steps to install the necessary plugins for Docker and SonarQube integration:
Installing Docker Plugin
Open Jenkins:
- Access the Jenkins dashboard by navigating to the URL of your Jenkins instance in a web browser.
Navigate to the Plugin Manager:
Click on "Manage Jenkins" from the Jenkins dashboard.
Select "Manage Plugins" from the dropdown menu.
Install Docker Plugin:
In the "Available" tab, search for "Docker Pipeline" or "Docker" in the filter box.
Check the box next to the "Docker Pipeline" plugin.
Click on the "Install without restart" button to install the plugin.

Installing SonarQube Plugin
Install SonarQube Plugin:
Similarly, search for "SonarQube Scanner" or "SonarQube" in the filter box.
Check the box next to the "SonarQube Scanner for Jenkins" plugin.
Click on the "Download now and install after restart" button to install the plugin and restart Jenkins.

Step 6 - Authentication Setup for Seamless Integration
As we move towards the final phase of setting up our environment, it's crucial to authenticate the tools we'll be utilizing with Jenkins.
This authentication ensures smooth integration during the execution of our CI/CD pipeline.
1. Authenticating Jenkins with GitHub
To start, we authenticate Jenkins with GitHub, providing access to our source code repositories hosted on GitHub. This authentication enables Jenkins to efficiently fetch source code, trigger builds, and conduct other Git-related operations seamlessly.
2. Authentication Token for SonarQube
Next, we generate an authentication token for SonarQube. This token allows Jenkins to securely log into SonarQube and conduct code quality scans as part of our CI process. By authenticating SonarQube, we empower Jenkins to effectively analyze code quality and identify potential issues during the build process.
3. Integrating Docker Hub with Jenkins
In addition, we authenticate Docker Hub into Jenkins, enabling seamless interaction between Jenkins and the Docker registry. This authentication facilitates the automated publishing of Docker images as part of our CI/CD pipeline, streamlining the deployment process and ensuring efficient image management.
Lets take this step by step
To authenticate Github with Jenkins we need to first generate a token on Github and we then pass that token as a secret text to Jenkins.
Here is how
Goto GitHub ==> Setting ==> Developer Settings ==> Personal access tokens ==> Tokens(Classic) ==> Generate new token


Once the token is generated, GitHub will display it on the screen.
This is the only time you'll see the token, so make sure to copy it and store it securely.
Now that you have your token, navigate to your Jenkins instance by visiting the URL associated with your Jenkins server.
In Jenkins, go to manage Jenkins, then go to credentials, to System then global credentials and add a new credential.
As seen below

Choose "Secret text" as the kind of credential, and paste the GitHub token into the provided field.
When adding the credential in Jenkins, remember to give it a meaningful ID or description. This ID will be used to reference the credential in your Jenkinsfile or pipeline script.
In my own case here, i used github as my id.

Save the credential in Jenkins, ensuring that it's correctly configured.
You can now use this credential ID in your Jenkinsfile or pipeline script to authenticate with GitHub during your CI/CD processes.
To generate a token on SonarQube, follow these steps:
Log in to your SonarQube instance. Navigate to your profile settings by clicking on your username in the top right corner.
Then click "My Account"

Select "Security" from the right-hand menu.
Click on "Generate Tokens" under the "User Token" section.
Provide a name for your token to identify its purpose.
Click on "Generate" to create the token.

Once the token is generated, copy it to your clipboard.
Be sure to store it securely, as you won't be able to access it again.
After generating the SonarQube token, follow a similar process as we did for Github to add it to Jenkins:
Navigate to your Jenkins instance.
Go to the credentials section and add a new credential.
Choose "Secret text" as the kind of credential.
Paste the SonarQube token into the provided field.

Give the credential a meaningful ID. In my case it is Sonar
Save the credential in Jenkins.
Now you can use this credential ID in your Jenkinsfile or pipeline script to authenticate with SonarQube during your CI/CD processes.
To set up authentication with Docker Hub on Jenkins using your username and password, follow these steps:
If you don't already have one, create an account on Docker Hub.
Log in to your Docker Hub account.
In Jenkins, navigate to the credentials section and add a new credential.
Choose "Username with password" as the kind of credential.
Remember, we selected "secret text" earlier for GitHub and SonarQube.
Enter your Docker Hub username and password into the provided fields.
Give the credential a meaningful ID or description for easy identification.

Save the credential in Jenkins.
Now Jenkins is authenticated with your Docker Hub account, and you can use this credential ID in your Jenkinsfile or pipeline script to push Docker images to your Docker Hub repository during your CI/CD processes.
you should have something like this by now

With this in place, here's a recap of our progress so we are in sync:
Provisioning Infrastructure: We set up an AWS EC2 instance to serve as both our Jenkins and SonarQube servers. Docker was installed on this instance to facilitate containerization.
Configuring Jenkins: After setting up the instance, we configured Jenkins by installing essential plugins such as Docker and SonarQube. These plugins are pivotal for integrating Jenkins with other tools and enabling various CI/CD functionalities.
Authenticating External Services: Jenkins was authenticated with external services by providing necessary tokens and credentials.
This involved authenticating with GitHub for source code management, SonarQube for code quality analysis, and Docker Hub for container image management.
With these steps completed, our Jenkins environment is fully prepared to execute the CI portion of our CI/CD pipeline.
We can now proceed with triggering the build process to initiate our CI workflows.
Step 7 - Creating the Pipeline:
To create the pipeline in Jenkins, follow these steps:
Log into Jenkins: Access your Jenkins instance using the provided URL.
Fork the Repository: If you haven't already, fork the repository containing the Java-based application into your Github account.
The repository contains our source code for our application as well as our JenkinsFile.
Forking simply means having this exact copy of our repository in your own github account as well
To Fork, make sure you are logged into your Github account then click on this link, then click on fork at the top right.
Navigate to Jenkins: In Jenkins, click on New item at the top left and then click on pipeline then ok
Define Pipeline Script:
After clicking Ok, it should take you to a new interface to define our pipeline. Scroll down to the pipeline.
You have two options for defining the pipeline script:
Copy and Paste: You can copy the provided Jenkinsfile script and paste it directly into the pipeline configuration within Jenkins.
Specify File Path: Alternatively, you can specify the path to the Jenkinsfile within your Git repository.
This allows Jenkins to retrieve the pipeline script directly from your repository, enabling version control and easier updates.
For our project, we'll opt for the second option, specifying the path to the Jenkinsfile in our Git repository.

This approach ensures that Jenkins always uses the latest version of the pipeline script and allows for seamless collaboration and version tracking.
Configure Pipeline: Adjust parameters in the pipeline script as necessary. Such as specifying the branch name and the path to the Jenkinsfile script in your repository.
In my case, I am using the main branch and and my Jenkinsfile is within the
spring-boot-appfolder inside my repository
Save Pipeline: Save the pipeline configuration in Jenkins.
Here is the content of our script
pipeline {
  agent {
    docker {
      image 'abhishekf5/maven-abhishek-docker-agent:v1'
      args '--user root -v /var/run/docker.sock:/var/run/docker.sock' // mount Docker socket to access the host's Docker daemon
    }
  }
  stages {
    stage('Checkout') {
      steps {
        sh 'echo passed'
        git branch: 'main', url: 'https://github.com/DevOpsGodd/Ci-cd-with-jenkins-and-argocd.git'
      }
    }
    stage('Build and Test') {
      steps {
        sh 'ls -ltr'
        // build the project and create a JAR file
        sh 'cd spring-boot-app && mvn clean package'
      }
    }
    stage('Static Code Analysis') {
      environment {
        SONAR_URL = "http://52.28.235.242:9000"
      }
      steps {
        withCredentials([string(credentialsId: 'sonar', variable: 'SONAR_AUTH_TOKEN')]) {
          sh 'cd spring-boot-app && mvn sonar:sonar -Dsonar.login=$SONAR_AUTH_TOKEN -Dsonar.host.url=${SONAR_URL}'
        }
      }
    }
    stage('Build and Push Docker Image') {
      environment {
        DOCKER_IMAGE = "uthycloud/jenkins-cicd:${BUILD_NUMBER}"
        // DOCKERFILE_LOCATION = "spring-boot-app/Dockerfile"
        REGISTRY_CREDENTIALS = credentials('dockerhub')
      }
      steps {
        script {
            sh 'cd spring-boot-app && docker build -t ${DOCKER_IMAGE} .'
            def dockerImage = docker.image("${DOCKER_IMAGE}")
            docker.withRegistry('https://index.docker.io/v1/', "dockerhub") {
                dockerImage.push()
            }
        }
      }
    }
    stage('Update Deployment File') {
        environment {
            GIT_REPO_NAME = "Ci-cd-with-jenkins-and-argocd"
            GIT_USER_NAME = "devopsgodd"
        }
        steps {
            withCredentials([string(credentialsId: 'github', variable: 'GITHUB_TOKEN')]) {
                sh '''
                    git config user.email "huxman69@gmail.com"
                    git config user.name "Uthman"
                    BUILD_NUMBER=${BUILD_NUMBER}
                    sed -i "s/replaceImageTag/${BUILD_NUMBER}/g" spring-boot-app-manifests/deployment.yml
                    git add spring-boot-app-manifests/deployment.yml
                    git commit -m "Update deployment image to version ${BUILD_NUMBER}"
                    git push https://${GITHUB_TOKEN}@github.com/${GIT_USER_NAME}/${GIT_REPO_NAME} HEAD:main
                '''
            }
        }
    }
  }
}
Understanding the Pipeline Script:
Let's break down the key components of the provided pipeline script:
Agent Section: Specifies the environment in which the pipeline executes. In this instance, it utilizes a Docker agent with a Maven image.
Stages Section: Defines the sequential stages of the pipeline, each representing a specific task.
Checkout Stage: Fetches the source code from the designated GitHub repository.
Build and Test Stage: Utilizes Maven to build and test the Java application.
Static Code Analysis Stage: Conducts static code analysis through SonarQube. The SonarQube server URL is configured, and authentication is managed through credentials.
Build and Push Docker Image Stage: Constructs a Docker image for the application and pushes it to Docker Hub. Authentication for Docker Hub is handled through credentials.
Update Deployment File Stage: Modifies the deployment file for Kubernetes to integrate the new Docker image tag. Git credentials are employed to commit and push these changes to the GitHub repository.
Each stage is dedicated to a specific task within the CI process, ensuring comprehensive coverage from code compilation to containerization.
It's important to note that this pipeline script focuses solely on CI activities and does not encompass application deployment.
For customization, pay attention to the following script modifications:
GitHub Repository URL: Replace the URL (
https://github.com/DevOpsGodd/Ci-cd-with-jenkins-and-argocd.git) with the URL of your own GitHub repository.SonarQube Configuration: Update the
SONAR_URLvariable with the URL of your SonarQube server. Additionally, replace the value ofcredentialsId(sonar) with the ID of your SonarQube token credential.(remember i told you take note of what you used as you Credenitals ID earlier)Deployment Manifests: It's crucial to note that this pipeline script is solely focused on CI tasks and does not handle application deployment.
Our deployment manifests reside in a separate folder namedspring-boot-app-manifestswithin the repository, the last segment of the Jenkinsfile updates the deployment file with the new Docker image tag.So ensure to modify the file paths accordingly to reflect your repository structure.

Step 8 - Running the Pipeline:
With everything set up, the next step is to trigger the build process.
When running the build for the first time, carefully review the console output logs.
If there are any errors or issues encountered during the build process, the console output will provide valuable insights into what went wrong.

Iterate on the build process, addressing any issues that arise, until you achieve a successful build.
Step 9 - Setting up Minikube, kubectl and ArgoCD operator
Now that our deployment file has been updated with the new image, our application is primed for deployment to a Kubernetes cluster.
We'll be deploying to a Minikube cluster using Argo CD.
To accomplish this, we need to set up our Minikube cluster and install the Argo CD operator.
Here's how to proceed:
Go to your terminal and run the following commands to set up Minikube.
sudo apt-get update
sudo apt-get install docker.io
curl -LO https://storage.googleapis.com/minikube/releases/latest/minikube-linux-amd64
sudo install minikube-linux-amd64 /usr/local/bin/minikube
sudo usermod -aG docker $USER && newgrp docker
sudo reboot docker
minikube start --driver=docker
Then we install kubectl which would allow us interact with our cluster
To install kubectl, run the commands below
curl -LO "https://storage.googleapis.com/kubernetes-release/release/$(curl -s https://storage.googleapis.com/kubernetes-release/release/stable.txt)/bin/linux/amd64/kubectl"
chmod +x ./kubectl
sudo mv ./kubectl /usr/local/bin
kubectl version
You should have this after installing both

Installing Argo CD Operator:
The Argo CD Operator simplifies the management and deployment of applications using GitOps principles.
It automates tasks required to operate an Argo CD cluster, streamlining our deployment process.
Follow these steps to install:
Install Operator Lifecycle Manager (OLM):
Use the following command to install OLM, a tool for managing Operators on your cluster:
curl -sL https://github.com/operator-framework/operator-lifecycle-manager/releases/download/v0.27.0/install.sh | bash -s v0.27.0
Install the Operator:
Run the command below to install the Argo CD Operator:
kubectl create -f https://operatorhub.io/install/argocd-operator.yamlThis Operator will be installed in the "operators" namespace and will be usable from all namespaces in the cluster.
Verify Installation:
After installation, monitor the Operator's status using the following command:
kubectl get csv -n operators

Step 10 - Creating the Argo CD cluster
With the Operator installed, we can proceed to create a new Argo CD cluster with a basic default configuration.
Create Argo CD Cluster:
Create a YAML file named
argocd-basic.ymlwith the following content:apiVersion: argoproj.io/v1alpha1 kind: ArgoCD metadata: name: example-argocd labels: example: basic spec: {}
Apply Configuration:
Apply the configuration by running the command:
kubectl apply -f argocd-basic.yml
You can use the following commands to check the running pods and services:
kubectl get pods
kubectl get svc
By default, services are often set to use ClusterIP, which limits public access.


To enable access, you can change the service type to NodePort:
Edit Service Configuration: Use the following command to edit the service configuration:
kubectl edit svc example-argocd-server
Change Service Type: In the editor, change the type field from ClusterIP to NodePort.

Save and Exit the Editor
If you run the kubectl get svc command again, you should see what we just modified

Access Argo CD UI: Now, you can run the following command to create a tunnel for accessing the Argo CD UI:
minikube service example-argocd-server
This command will open a tunnel to the Argo CD UI, allowing you to access it via your web browser.

You can visit any of the urls to access our Argo CD UI

To retrieve the Argo CD password and login, follow these steps:
Retrieve Secret: Run the following command on the terminal to get the secret:
kubectl get secret
then we run
kubectl edit secret example-argocd-clusterto access it.
Decode Secret: Identify the secret associated with Argo CD and copy its value. The password is automatically encrypted so we need to decode the secret using the following command:
echo <secret_value> | base64 -d
Login to Argo CD: Visit the Argo CD interface in your web browser and enter the following credentials:
Username: admin
Password: Use the decrypted password obtained in step 2- without the % that ended it
If you've made it this far, congratulations to you. Now we have gotten to the final stage of our project.
Step 11 - Deploying the Spring boot application
To deploy our Spring Boot application using the Argo CD web interface, follow these steps:
Navigate to Applications: Once logged in, navigate to the "Applications" tab and click on "NEW APP"
Configure Application: Provide the necessary details for configuring the application deployment. This includes:
Application Name: Choose a name for your application.
Project: Assign the application to a specific project if applicable.
Repository URL: Provide the URL of the Git repository containing your Spring Boot application code.
Path: Specify the path within the repository where the application manifests are located.
Cluster URL: Enter the URL of the Kubernetes cluster where you want to deploy the application.
Namespace: Specify the Kubernetes namespace where the application will be deployed.


Create Application: Click on the "Create Application" button to initiate the process of creating a new application deployment.
Check Application: Once the deployment is complete, you can go to the terminal and run the following commands to see our pods and services
 kubectl get pods
 kubectl get svc
You can see our spring boot app is running already
Access Application: To access our application, we need to create a service tunnel to access it as we did earlier for our argo cd
minikube service spring-boot-app-service
This command will automatically open your default web browser with the application URL. If not, you can manually navigate to the URL provided in the terminal.

Conclusion:
Congratulations on completing the deployment of your Java-based application using a CI/CD pipeline!
Throughout this project, you've gained a deep understanding of how to set up and configure various tools such as Jenkins, Maven, SonarQube, and Argo CD to automate the build, test, and deployment processes.
By integrating these tools seamlessly, you've learned how to streamline the development lifecycle and ensure the continuous delivery of high-quality software.
Thank you for embarking on this journey with me, and I hope you found this experience valuable and insightful.
Additional Resources:
Project GitHub Repository: Access the source code and resources used in this project on the GitHub repository: Ci-cd-with-jenkins-and-argocd
YouTube Demonstration: For a visual walkthrough of the steps involved in building a CI/CD pipeline for a Java-based application, watch Abhishek's demonstration on YouTube.
